FALL SALE – 15% OFF RAMPS – USE CODE: MOBILE15 | Free Shipping From $299

Last month, Ninja Instructor and Personal Trainer Bekah Rottenberg helped us understand how adding strength training to your routine will have you reaping huge benefits on the bike (check it out here).

Today Bekah’s giving us the tools to tackle a serious challenge for many riders, one that impacts the most important position in mountain biking and the foundation of every single skill – the Ready Position.

The Goal

Proper riding position places your knees stacked directly over your toes. This position provides stability and balance and allows you to maneuver the bike underneath you (AKA bike-body separation).

The Challenge

Many riders’ knees tend to track inwards – this is called Knee Cave. While sometimes this is out of  fear or habit, it’s often due to a lack of strength and mobility.

The Fix

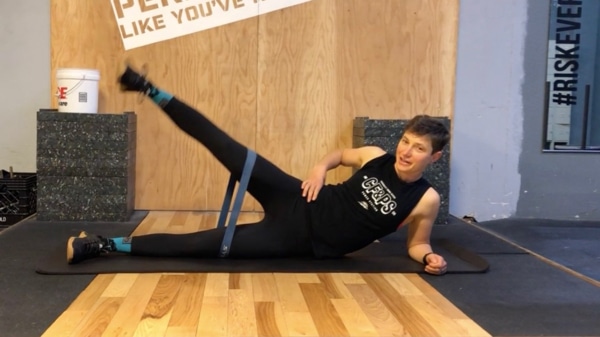
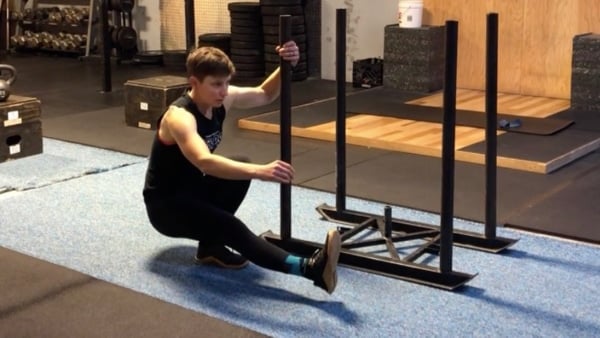
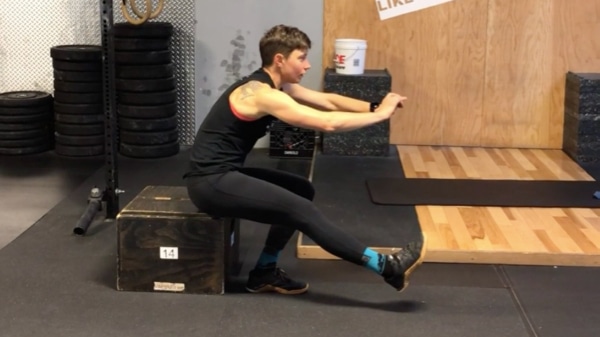
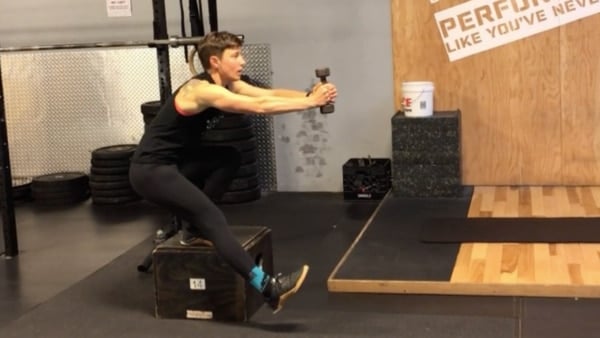
Here are 5 exercises you can do off the bike to strengthen your glutes, adductors, and core with the ultimate goal to bring your knees out over your toes to create a more stable and confident riding platform. Let’s dive in! (Watch the entire video here or click on the specific exercise below to jump directly to it in YouTube).

1. Banded clamshells
2. Pistol squat with stable support
3. Pistol squat with box
4. Pistol squat on box with weighted counter balance
5. Pistol squat on Bosu Ball
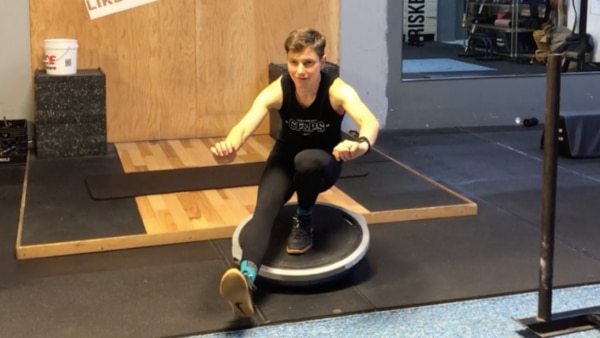
Bekah Rottenberg is a NASM certified personal trainer, Certified USA Olympic Weightlifting Coach, and PMBI certified Mountain Bike Instructor. Bekah coaches for Ninja Mountain Bike Performance, Northwest Excursions, teaches strength and spin classes at her local gym, The Power Station, in Hood River, OR, and offers weekly training plans for mountain bikers at www.BravEndeavors.com.

3 Responses

  1. Somebody should really check her exercises and their appropriateness for intermediate athletes.Clam shells are a closed chain exercises – the feet remain together the knees are bent and only the knees separate. She is demonstrating a side leg lift, which is open chain and put a tremendous amount of pressure on the hip joint -Especially with a band.

    The single leg knee squats below 90° are also only for people who have progressed to that level of difficulty- Could really blow someone’s knee out. Then it just gets worse..

    Great topic. But her solutions are way off base for functional exercise and safety and progression. That’s just my opinion:)

  2. 100 % concur with above comments!!
    I find it difficult to understand how a person “credentialed” as she claims , would post such difficult and potentially injurious exercises to an general audience.

    1. Hi, thank you for the feedback! I use both these exercises regularly with my clients who are beginner, intermediate, and advanced cyclists and I’ve seen great results. The pistol squat is definitely an advanced exercise when done unsupported, which is why the article offer progressions. Side lying leg lifts and clamshells do a great job at activating the glutes both to increase strength and turn on those muscles prior to squatting. There are many exercises that folks can do to increase single leg strength and stability. The purpose of the article was to provide two options, and have one with a progression (pistol squats). Do you have exercises you prefer to use for single leg strength and stability?

Leave a Reply

Your email address will not be published. Required fields are marked *

YOU LEFT THIS

IN YOUR BASKET

Checkout now and get Free Shipping

on your order.

keep me in the loop

NOTIFY ME!

I’d like to be notified when new events are added.

Your Privacy is Protected. We will never sell or share your information.

Fundamentals Trail Application - Women's Only

Here’s What We’ll Cover

The specific skills taught in this clinic will depend on available trail features and will vary between locations. Skills covered may include:

  • Rock / Log Step-Ups 
  • Pedal Assisted Front Wheel Lifts
  • Steep Transitions, Roll-Downs
  • Reading trail and line choice
  • Using trail features for maximum flow
  • Turning (Low Speed)
  • Navigating Trail Obstacles
  • Switchbacks – Optimal Line Choice
  • Ratcheting application – how & when 
  • Track stands
  • Braking for Speed 
  • Shifting – Timing + Technique on Technical Terrain
  • Skinnies
  • Off-Camber Trails 
  • Berms 
  • Water crossings 
  • Roots 

The Schedule*

  • 1:15-1:30pm Meet your instructor  | Arrival at course venue + equipment check
  • 1:30 – 1:45pm Fundamentals Skills | Rapid Review 
  • 1:45 – 3:45pm Coached Trail Ride | Sessioning & Skills Application
  • 3:45-4:00pm Review, questions & next steps | #Ridelikeaninja

*Clinic schedule and skills covered may vary according to location and terrain.

Fundamentals Trail Application

Here’s What We’ll Cover

The specific skills taught in this clinic will depend on available trail features and will vary between locations. Skills covered may include:

  • Rock / Log Step-Ups 
  • Pedal Assisted Front Wheel Lifts
  • Steep Transitions, Roll-Downs
  • Reading trail and line choice
  • Using trail features for maximum flow
  • Turning (Low Speed)
  • Navigating Trail Obstacles
  • Switchbacks – Optimal Line Choice
  • Ratcheting application – how & when 
  • Track stands
  • Braking for Speed 
  • Shifting – Timing + Technique on Technical Terrain
  • Skinnies
  • Off-Camber Trails 
  • Berms 
  • Water crossings 
  • Roots 

The Schedule*

  • 1:15-1:30pm Meet your instructor  | Arrival at course venue + equipment check
  • 1:30 – 1:45pm Fundamentals Skills | Rapid Review 
  • 1:45 – 3:45pm Coached Trail Ride | Sessioning & Skills Application
  • 3:45-4:00pm Review, questions & next steps | #Ridelikeaninja

*Clinic schedule and skills covered may vary according to location and terrain.

Ninja Kids clinics

Here’s What We’ll Cover

Some of the skills taught and practiced in the Kids Fundamentals Clinic may include:

  • Ninja (Ready) Position
  • The Riding Rainbow: Body Position
  • How to use your gears
  • Front + Rear Wheel Lifts
  • Safely getting on/off your bike
  • Getting over trail obstacles
  • Turning + Switchbacks
  • Reading the trail: Red Light, Yellow Light, Green Light
  • When and how to brake
  • The 4 Climbing Positions
  • Descending in control
  • How to have fun and be safe!
  • Safety check, bike care

Clinic schedule, time and skills covered may vary according to location and terrain.

2-Day CAMPS

Sample Camp Schedule*

Day 1 (Saturday)

  • 8:45-9:00 Meet your instructor  | Arrival at course venue + equipment check
  • 9:00-9:15 Let’s get started | Introductions, camp overview, bike safety check, bike set-up review
  • 9:15-9:30 Warm-up ride | Head to skills area
  • 9:30-12:15 Mornings skills session | Ready position, bike-body separation, effective braking, fluid shifting, body positioning, wheel lifts
  • 12:15-1:30 Lunch break | BYO
  • 1:30 – 4:00 Intro to jumping | Manuals, bunny hops + how to safely jumping (and land) your mountain bike

Day 2 (Sunday)

  • 8:45-9:00 Meet at trailhead | Gear up for day 2!
  • 9:00-9:15 Review | Brief review of Day 1 skills
  • 9:15-12:00 Morning skills session | High-speed cornering, switchbacks, drops, rock dodge, technical climbing & descending
  • 12:00-1:00  Lunch break | BYO
  • 1:00-3:45 Trail ride + skills application | Put those skills to work!
  • 3:45-4:00 Review, questions & next steps | #Ridelikeaninja


*Clinic schedule and skills covered may vary according to location and terrain.

After camp, you will see an immediate improvement in your riding and a boost in confidence on technical trails. You will be able to tackle rougher terrain and corners with greater control and flow through singletrack, switchbacks, and berms with more speed and efficiency.

Jumping Mini-Clinics

Here’s What We’ll Cover

Some of the skills taught and practiced in the Jumping Mini-Clinic may include:

  • Wheel lift Review
  • Bunny hops
  • Jumping body positioning
  • Anatomy of a jump
  • Speed vs. compression | How and when?
  • Landing with precision
  • Let’s get jumping! | Jump progressions

The Schedule*

Please note, clinics may vary according to location and terrain.

  • 1:30-1:45  Meet your instructor | Arrival at course venue + equipment check
  • 1:45-2:00 Let’s get started | Introductions
  • 2:00 – 2:30  Intro to jumping | Wheel lifts, manual, bunny hop
  • 2:30 – 3:00 Reading the jump | Anatomy of a jump, speed vs compressi