🎄NINJA HOLIDAY SALE 🎅 60% OFF CLINICS / 25% OFF RAMPS | LOWEST PRICES OF THE YEAR

Days
Hrs
Mins
Secs

If you’re like me, you never gave up stomping through puddles on a rainy day. Fast-forward a few decades and now we get to trade our galoshes for bike tires. Creeks, brooks, rivers, or streams… every moving body of water poses an exciting challenge on your mountain bike and a chance to experience that same child-like mischief!

Here are a few tips to keep your confidence high and your risk of getting soggy low:

1. Ebb and flow

Waterways change frequently thanks to seasons and weather so don’t assume a creek will look and feel the same as last time. Just ask Instructor Richard! He learned this the hard way after a big rain turned a babbling brook into a 6 foot deep canal…

I came into it full speed and was stopped dead in my tracks by the surging flow. My bike was swiped right out from under me! I guess you could say it was a “refreshing” reminder not to make assumptions when it comes to creek crossings.

Water also speeds up erosion so exits will vary from ride to ride and something that was previously rock armored may be a loose, sketchy pile of chunder today.

2. When in doubt, scope it out

If you come across a creek in the middle of a pack of riders, give the rider in front of you some space. This will give you a chance to see their line, evaluate whether you’ll take the same route, and give any debris a chance to settle so you can see what’s under the surface. Plus, do you know what happens when you tailgate someone into a creek and they don’t make it across? Neither will you!

If you’re in the front of the pack or riding solo and you’re unsure of the creek’s ride-ability, get off the bike to see what what you’re up against. How deep and fast is water is running and what’s at the bottom? Beware of anything deeper than your hubs. Is there sand, muck, slick rocks, or chunder? All require different tactics to get through just like out on the trail, but with extra resistance and soggier consequences.

3. Pick a line
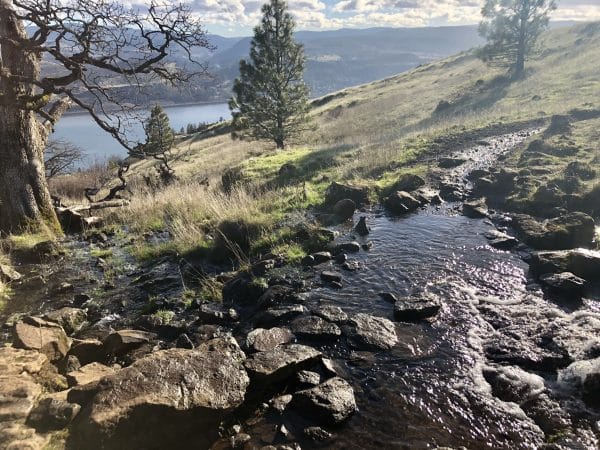
Right on! You’ve determined that the creek is rideable. Now choose your line through the water noting anything lurking under the surface that you need to avoid. This line should connect easily to your exit route. Take note if your exit has a steep pitch that needs extra power and momentum to boost up or roots and ledges that require a front wheel lift.

4. Pick a method

It’s time to dig into your skills tool box and determine which skill, or combination of skills you will use to cross the water –

5. Ready yourself

You have a line, method, and exit strategy – it’s time to execute. Shift to an easier gear before entering the water – with extra resistance and a steep exit you’re going to need all the help you can get. If you’re coasting or ratcheting through a rock garden then be in the ready position so you can recover from anything that tries to throw you off line. If you’re going for a manual, then get that front wheel up before it hits the water and carry your momentum through to the exit.

6. Commit
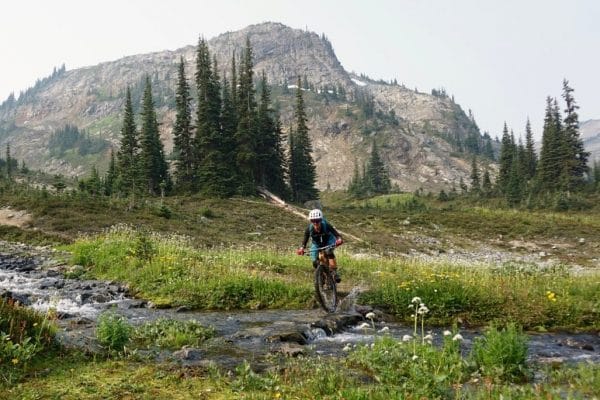
Keep your head up and your eyes where you want to go – the exit! When it comes to crossing water, whenever possible, straight is best. Avoid trying to turn in the water or use your brakes to reduce your risk of sliding out and going down. A little bit of momentum is your friend. Once you get to the exit, give yourself the extra boost to power out with a few pedal strokes and a forward hip thrust or front wheel lift, if needed.

7. Or… Walk it
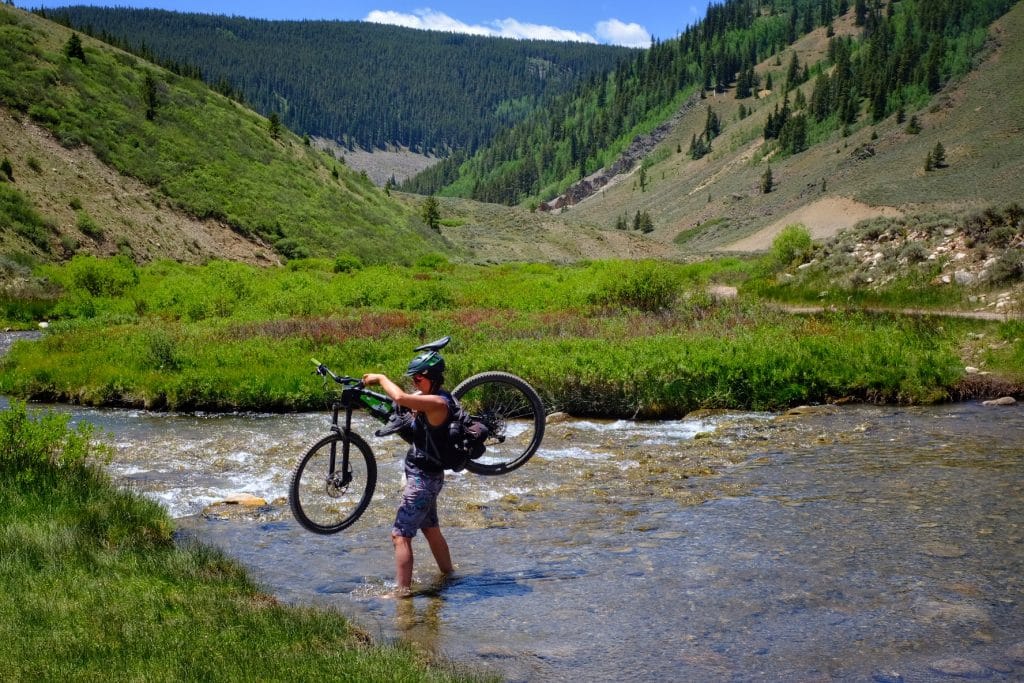
If you’re not feeling confident about the crossing, don’t be afraid to walk it. Pack extra socks for big crossings so you can carry your shoes and wear a pair of socks for traction.

8. Recover
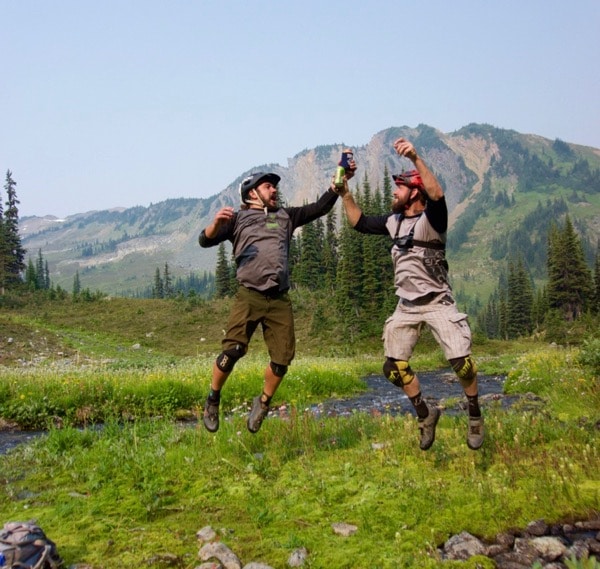
High fives all around whether you manualed, ratcheted, coasted, grunted, toppled over or walked through your creek crossing. Every creek is different and each success and failure will build up your skills toolbox to make you more confident to tackle the next one. Once you’re back on dry land and moving, lightly drag your brakes for a few rotations to dry off your rotors and be on your merry way!

9. So… how bad is this for your bike?

Submerging your pedals and bottom bracket will allow water to get into your bearings so dry your bike and turn it on its side or upside down ASAP to help remove it. Consider investing in a fender to help protect your headset (and your face) and for winter riding, clean and dry your bike off before storing to avoid freezing water expansion on any seals. Lastly, speed up your maintenance schedule for cleaning and re-greasing your bearings to extend the life of your trusty steed!

Leave a Reply

Your email address will not be published. Required fields are marked *

YOU LEFT THIS

IN YOUR BASKET

Checkout now and get Free Shipping

on your order.

keep me in the loop

NOTIFY ME!

I’d like to be notified when new events are added.

Your Privacy is Protected. We will never sell or share your information.

Fundamentals Trail Application - Women's Only

Here’s What We’ll Cover

The specific skills taught in this clinic will depend on available trail features and will vary between locations. Skills covered may include:

  • Rock / Log Step-Ups 
  • Pedal Assisted Front Wheel Lifts
  • Steep Transitions, Roll-Downs
  • Reading trail and line choice
  • Using trail features for maximum flow
  • Turning (Low Speed)
  • Navigating Trail Obstacles
  • Switchbacks – Optimal Line Choice
  • Ratcheting application – how & when 
  • Track stands
  • Braking for Speed 
  • Shifting – Timing + Technique on Technical Terrain
  • Skinnies
  • Off-Camber Trails 
  • Berms 
  • Water crossings 
  • Roots 

The Schedule*

  • 1:15-1:30pm Meet your instructor  | Arrival at course venue + equipment check
  • 1:30 – 1:45pm Fundamentals Skills | Rapid Review 
  • 1:45 – 3:45pm Coached Trail Ride | Sessioning & Skills Application
  • 3:45-4:00pm Review, questions & next steps | #Ridelikeaninja

*Clinic schedule and skills covered may vary according to location and terrain.

Fundamentals Trail Application

Here’s What We’ll Cover

The specific skills taught in this clinic will depend on available trail features and will vary between locations. Skills covered may include:

  • Rock / Log Step-Ups 
  • Pedal Assisted Front Wheel Lifts
  • Steep Transitions, Roll-Downs
  • Reading trail and line choice
  • Using trail features for maximum flow
  • Turning (Low Speed)
  • Navigating Trail Obstacles
  • Switchbacks – Optimal Line Choice
  • Ratcheting application – how & when 
  • Track stands
  • Braking for Speed 
  • Shifting – Timing + Technique on Technical Terrain
  • Skinnies
  • Off-Camber Trails 
  • Berms 
  • Water crossings 
  • Roots 

The Schedule*

  • 1:15-1:30pm Meet your instructor  | Arrival at course venue + equipment check
  • 1:30 – 1:45pm Fundamentals Skills | Rapid Review 
  • 1:45 – 3:45pm Coached Trail Ride | Sessioning & Skills Application
  • 3:45-4:00pm Review, questions & next steps | #Ridelikeaninja

*Clinic schedule and skills covered may vary according to location and terrain.

Ninja Kids clinics

Here’s What We’ll Cover

Some of the skills taught and practiced in the Kids Fundamentals Clinic may include:

  • Ninja (Ready) Position
  • The Riding Rainbow: Body Position
  • How to use your gears
  • Front + Rear Wheel Lifts
  • Safely getting on/off your bike
  • Getting over trail obstacles
  • Turning + Switchbacks
  • Reading the trail: Red Light, Yellow Light, Green Light
  • When and how to brake
  • The 4 Climbing Positions
  • Descending in control
  • How to have fun and be safe!
  • Safety check, bike care

Clinic schedule, time and skills covered may vary according to location and terrain.

2-Day CAMPS

Sample Camp Schedule*

Day 1 (Saturday)

  • 8:45-9:00 Meet your instructor  | Arrival at course venue + equipment check
  • 9:00-9:15 Let’s get started | Introductions, camp overview, bike safety check, bike set-up review
  • 9:15-9:30 Warm-up ride | Head to skills area
  • 9:30-12:15 Mornings skills session | Ready position, bike-body separation, effective braking, fluid shifting, body positioning, wheel lifts
  • 12:15-1:30 Lunch break | BYO
  • 1:30 – 4:00 Intro to jumping | Manuals, bunny hops + how to safely jumping (and land) your mountain bike

Day 2 (Sunday)

  • 8:45-9:00 Meet at trailhead | Gear up for day 2!
  • 9:00-9:15 Review | Brief review of Day 1 skills
  • 9:15-12:00 Morning skills session | High-speed cornering, switchbacks, drops, rock dodge, technical climbing & descending
  • 12:00-1:00  Lunch break | BYO
  • 1:00-3:45 Trail ride + skills application | Put those skills to work!
  • 3:45-4:00 Review, questions & next steps | #Ridelikeaninja


*Clinic schedule and skills covered may vary according to location and terrain.

After camp, you will see an immediate improvement in your riding and a boost in confidence on technical trails. You will be able to tackle rougher terrain and corners with greater control and flow through singletrack, switchbacks, and berms with more speed and efficiency.

Jumping Mini-Clinics

Here’s What We’ll Cover

Some of the skills taught and practiced in the Jumping Mini-Clinic may include:

  • Wheel lift Review
  • Bunny hops
  • Jumping body positioning
  • Anatomy of a jump
  • Speed vs. compression | How and when?
  • Landing with precision
  • Let’s get jumping! | Jump progressions

The Schedule*

Please note, clinics may vary according to location and terrain.

  • 1:30-1:45  Meet your instructor | Arrival at course venue + equipment check
  • 1:45-2:00 Let’s get started | Introductions
  • 2:00 – 2:30  Intro to jumping | Wheel lifts, manual, bunny hop
  • 2:30 – 3:00 Reading the jump | Anatomy of a jump, speed vs compression, landings
  • 3:00 – 3:45 Let’s jump! | Jumping progressions on table tops
  • 3:45-4:00 Review and next steps | #ridelikeaninja


*Clinic schedule and skills covered may vary according to location and terrain.

Intermediate / advanced clincs

Here’s What We’ll Cover

Some of the skills taught and practiced in the Intermediate/Advanced clinic may include:

  • Negotiating trail obstacles (i.e. rock gardens, roots, logs)
  • Steep transitions
  • Drops
  • High speed cornering
  • Technical climbing
  • Technical descending
  • Advanced braking
  • Reading the trail
  • Introduction to energy management & flow
  • Pumping for speed & air
  • Technical Switchbacks (where available)
  • Ratcheting & Trackstands
  • Visualization

The Schedule*

  • 8:45-9:00 Meet your instructor  | Arrival at course venue + equipment check
  • 9:00-9:15 Let’s get started | Introductions
  • 9:15-9:45 Accelerated review of Fundamentals | With intermediate+advanced progressions
  • 9:45-12:00 Morning skills session | High-speed cornering, Switchbacks, drops, rock dodge, technical climbing & descending
  • 12:00-1:00  Lunch break | BYO
  • 1:00-3:45 Trail ride + skills application | Put those skills to work!
  • 3:45-4:00 Review, questions & next steps | #Ridelikeaninja

*Clinic schedule and skills covered may vary according to location and terrain.

WOMEN'S ONLY Fundamentals Combo

Here’s What We’ll Cover

The specific skills taught in this clinic will depend on available trail features and will vary between locations. Skills covered may include:

  • The Ready Position
  • Bike/Body Separation
  • Intro to Steep Transitions
  • Effective Braking
  • Braking for speed
  • Wheels lifts – Step-Ups
  • Shifting, Timing & Cadence
  • Negotiating trail obstacles
  • Turning / Switchbacks
  • Climbing + Descending
  • Dismounting
  • Mind skills
  • Steep Transitions, Roll-Downs
  • Reading trail and line choice
  • Using trail features for flow
  • Turning (Low Speed)
  • Ratcheting – how & when 
  • Track stands
  • Skinnies
  • Off-Camber Trails
  • Berms
  • Water crossings
  • Roots

The Schedule*

  • 8:45-9:00  Meet your instructor  | Arrival at course venue + equipment check
  • 9:00-9:15 Let’s get started | Introductions
  • 9:15am – 11:15 Skills & drills | Learn, learn, learn
  • 11:15am – 12:15 Take it to the trail | Apply what you’ve learned
  • 12:15 – 1:30pm Lunch Break | Rest & Refuel
  • 1:30 – 1:45pm Fundamentals Skills | Rapid Review 
  • 1:45 – 3:45pm Coached Trail Ride | Sessioning & Skills Application
  • 3:45-4:00pm Review, questions & next steps | #Ridelikeaninja

*Clinic schedule and skills covered may vary according to location and terrain.

Co-ed Fundamentals Combo

Here’s What We’ll Cover

The specific skills taught in this clinic will depend on available trail features and will vary between locations. Skills covered may include:

  • The Ready Position
  • Bike/Body Separation
  • Intro to Steep Transitions
  • Effective Braking
  • Braking for speed
  • Wheels lifts – Step-Ups
  • Shifting, Timing & Cadence
  • Negotiating trail obstacles
  • Turning / Switchbacks
  • Climbing + Descending
  • Dismounting
  • Mind skills
  • Steep Transitions, Roll-Downs
  • Reading trail and line choice
  • Using trail features for flow
  • Turning (Low Speed)
  • Ratcheting – how & when 
  • Track stands
  • Skinnies
  • Off-Camber Trails
  • Berms
  • Water crossings
  • Roots

The Schedule*

  • 8:45-9:00  Meet your instructor  | Arrival at course venue + equipment check
  • 9:00-9:15 Let’s get started | Introductions
  • 9:15am – 11:15 Skills & drills | Learn, learn, learn
  • 11:15am – 12:15 Take it to the trail | Apply what you’ve learned
  • 12:15 – 1:30pm Lunch Break | Rest & Refuel
  • 1:30 – 1:45pm Fundamentals Skills | Rapid Review 
  • 1:45 – 3:45pm Coached Trail Ride | Sessioning & Skills Application
  • 3:45-4:00pm Review, questions & next steps | #Ridelikeaninja

*Clinic schedule and skills covered may vary according to location and terrain.

Ninja MTB Logo

Women's Only Fundamentals Clinics

Level 1 - Here’s What We’ll Cover

Some of the skills taught and practiced in the Women’s Only Fundamentals Clinic may include:

  • The Ready Position
  • Bike/Body separation
  • Intro to Steep Transitions
  • Effective braking
  • Wheels lifts
  • Shifting + cadence
  • Negotiating trail obstacles
  • Turning / Switchbacks
  • Climbing + Descending
  • Dismounting
  • Mind skills

The Schedule*

  • 8:45-9:00  Meet your instructor  | Arrival at course venue + equipment check
  • 9:00-9:15 Let’s get started | Introductions
  • 9:15am – 11:15 Skills & drills | Learn, learn, learn
  • 11:15am – 12:00 Take it to the trail | Apply what you’ve learned
  • 12:00-12:15 Review and next steps | #ridelikeaninja
 

*Clinic schedule and skills covered may vary according to location and terrain.

Ninja MTB Logo

Co-ed Fundamentals Clinics

Level 1 - Here’s What We’ll Cover

Some of the skills taught and practiced in the Fundamentals Clinic may include:

  • The Ready Position
  • Bike/Body separation
  • Intro to Steep Transitions
  • Effective braking
  • Wheels lifts
  • Shifting + cadence
  • Negotiating trail obstacles
  • Turning / Switchbacks
  • Climbing + Descending
  • Dismounting
  • Mind skills

The Schedule*

  • 8:45-9:00  Meet your instructor  | Arrival at course venue + equipment check
  • 9:00-9:15 Let’s get started | Introductions
  • 9:15am – 11:15 Skills & drills | Learn, learn, learn
  • 11:15am – 12:00 Take it to the trail | Apply what you’ve learned
  • 12:00-12:15 Review and next steps | #ridelikeaninja
 

*Clinic schedule and skills covered may vary according to location and terrain.

LEAVING SO SOON?

60% Off

IF YOU SIGN UP FOR A MTB SKILLS CLINIC TODAY!

Enter your email below to get your limited time coupon code (valid for 48 hours).

Valid on all Skills Camps and Clinics. Your Privacy is Protected.

unlock an additional

5% Off

ANY JUMP RAMP

unlock

60% Off

ANY MTB SKILLS CLINIC

unlock an additional

5% Off

ANY JUMP RAMP ..

Awesome sauce!

60% Off

USE THIS CODE TO SIGN UP TODAY!

CHECKOUT4XY2

*Limited time offer. Valid for 48 hours on any upcoming MTB skills clinic or camp.

unlock an additional

5% Off

ANY JUMP RAMP

unlock

60% Off

ANY MTB SKILLS CLINIC

unlock an additional

5% Off

ANY JUMP RAMP

Check your texts

Reply “Y” to confirm your subscription.

Check your texts

Reply “Y” to confirm your subscription.