Have you ever been riding down the trail, turned your front wheel to avoid a large rock and then BUMP, your back wheel hits that same darn rock you were trying to avoid? As you’ve likely figured out, the back wheel doesn’t follow the same path as your front wheel when turning. The Solution? Introducing the Rock Dodge!
The Rock Dodge is a sharp, short turn used for avoiding a rock, sharp stick, pesky squirrel or other small obstacles you might encounter on the trail.
When done successfully, your front wheel will pass on one side of the obstacle and your back wheel will pass on the other side. The obstacle passes under your down-tube between your tires. You ride away without losing momentum, puncturing a tire or squashing a critter.
This is a low-speed skill and is most often used while climbing singletrack. Mastering the rock dodge will allow you to hone in on precise movements, keep you in full control of your bike, and make technical climbing that much easier. We can all use a little love on the climbs, am I right?
1. Start Flat
The best place to practice this skills is on a flat, relatively open area.
2. Identify Obstacle
Determine which obstacle you’re going to rock dodge – we recommend starting with something small. Be sure to look past the obstacle to make sure your exit is inline with the direction you intend to ride.
3. Aim For It
Ride right toward the obstacle — get close!
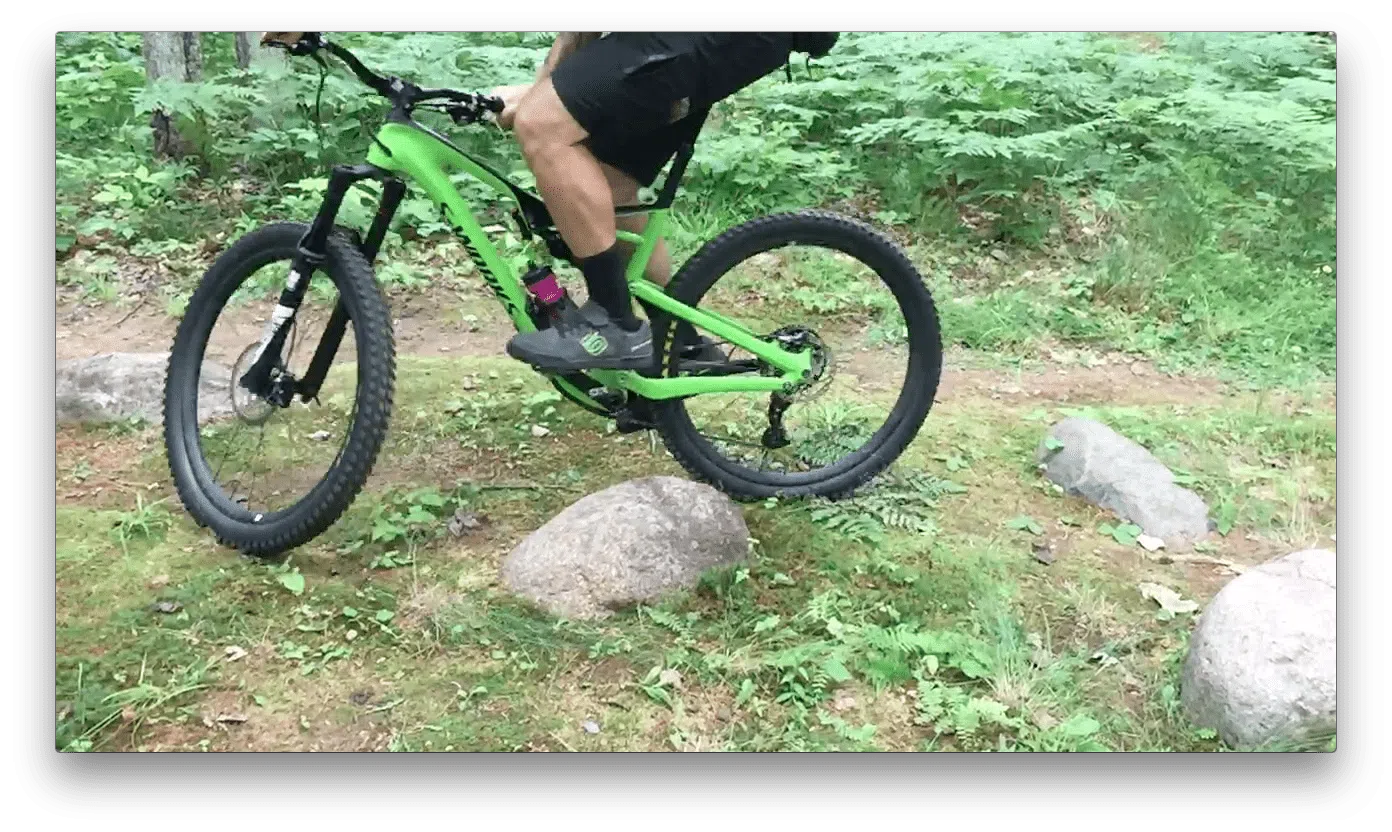
4. Wait For it
Right as your front wheel passes the obstacle, quickly and sharply turn your front wheel around it and quickly and then back towards the direction you’d like to continue riding.
5. Smooth
After your complete your rock dodge, make sure to get your eyes back up and ready for whatever’s next on the trail.
6. Practice!
Once you get proficient on flat ground, progress to an up-sloping area then eventually to a climbing, technical single track. Try rock dodging larger obstacles or multiple obstacles in a row.
Happy Dodging!
2 Responses
I believe that step 4 should start with:
Right as your front wheel passes the obstacle
not “as your back wheel passes”.
By submitting this form, you agree to receive recurring automated promotional and personalized marketing text messages (e.g. cart reminders) from Ninja MTB at the cell number used when signing up. Consent is not a condition of any purchase. Reply HELP for help and STOP to cancel. Msg frequency varies. Msg and data rates may apply.
unlock an additional
10% Off
ANY JUMP RAMP ..
By submitting this form, you agree to receive recurring automated promotional and personalized marketing text messages (e.g. cart reminders) from Ninja MTB at the cell number used when signing up. Consent is not a condition of any purchase. Reply HELP for help and STOP to cancel. Msg frequency varies. Msg and data rates may apply.
1:00-3:45 Trail ride + skills application | Put those skills to work!
3:45-4:00 Review, questions & next steps | #Ridelikeaninja
*Clinic schedule and skills covered may vary according to location and terrain.
After camp, you will see an immediate improvement in your riding and a boost in confidence on technical trails. You will be able to tackle rougher terrain and corners with greater control and flow through singletrack, switchbacks, and berms with more speed and efficiency.
Jumping Mini-Clinics
Here’s What We’ll Cover
Some of the skills taught and practiced in the Jumping Mini-Clinic may include:
Wheel lift Review
Bunny hops
Jumping body positioning
Anatomy of a jump
Speed vs. compression | How and when?
Landing with precision
Let’s get jumping! | Jump progressions
The Schedule*
Please note, clinics may vary according to location and terrain.
1:30-1:45 Meet your instructor | Arrival at course venue + equipment check
1:45-2:00 Let’s get started | Introductions
2:00 – 2:30 Intro to jumping | Wheel lifts, manual, bunny hop
2:30 – 3:00 Reading the jump | Anatomy of a jump, speed vs compression, landings


I believe that step 4 should start with:
Right as your front wheel passes the obstacle
not “as your back wheel passes”.
Good catch Tom! Thank you, we’ve made the correction to the article.