10% off Jump Ramps | Code: MOBILE10 | Exp. Fri 4/19

Ninja Mountain Bike Performance - Skills Clinics, MTB Jump Ramps and Bike Stands

Whether you are brand new to mountain biking or you’ve been riding for many years, it’s important that you have a baseline understanding of what your brakes do, why they are important and exactly how to use them. Having a solid braking foundation will allow you to build up to more advanced braking technique, and more advanced terrain!

What

You have two brake levers on your bike. In the US, a standard bike setup has the front brake on the left and the rear brake on the right (Think: Right Rear). In other parts of the world (i.e.; New Zealand, UK, Australia …) these are reversed!

Left Brake ➡️ Front Brake

Right Brake ➡️ Rear Brake

Your front and rear brake are arguably equally important and both serve a slightly different purpose. Let’s dive in…

Front Brake

Your front brake has your stopping power. Why is this? The front of the bike dips down when you apply your brakes and because of this, there is more weight on the front of the bike and thus more traction on the front tire. This means the front tire is less likely to skid. It also means, you must brake with good technique and body position to prevent being slung forward (or over-the-handlebars, “OTB”). More on body position in a minute!

Rear Brake

Your rear brake helps you to control your speed, but depending on terrain, may not necessarily be all that great at bringing you to a full stop. You may have noticed that you rear tire is more likely to skid.

Test It Out

It can be helpful to see for yourself, how these brakes function. Try the following drill:

  1. Grab your bike by the handlebars and stand off to the side, facing forward.
  2. With your hands on the bars apply pressure to only your back brake and push the bike forward. You should notice it dragging behind you but the bike would still move forward. This is a good indication that your rear brake may not the best at bringing you to a complete stop!
  3. Then, try only applying pressure to only your front brake and push the bike forward. You should notice how the bike would not move forward and your rear wheel might even lift. Bam – that front brake has considerably more stopping power!
  4. Now, put one foot on your pedal and push your heels down to weight the pedal at the same time you apply pressure to your front brake. Ah ha! You should notice the back wheel stays down and your bike doesn’t move

Brake Setup

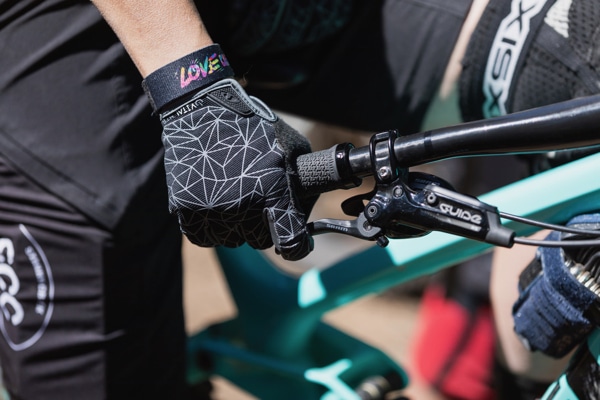
In order to use your brakes effectively, it is important that your brakes are setup correctly. You should be braking with your index finger and only your index finger.

You should adjust the positioning of your brake levers so that your index finger naturally lines up with the bend in the brake lever. This will give you better bike control, a better feel for what the brakes and tires are doing and give you greater confidence in your riding. When checking for this index finger / brake lever alignment, make sure your hands are completely on the hand grips — if the side of your hand is hanging off the bars (grips) you’ll be putting pressure on your Ulnar nerve. This pressure can cause numbness in your hand and arm, fatigue, discomfort and diminished control of your bike.

For further explanation on one finger braking, checkout this article.

Why

You use your brakes both to control your speed while riding and to bring yourself to a complete stop. Sometimes you will have the runway to gradually slow yourself down and other times, you might need to quickly and safely bring yourself to a stop (think: cliff!).

How

Now that we understand what each brake does and why they are important, it’s time to dive into the HOW of braking. Here are the key components:

Body Position

It is hugely important to have proper body position on the bike at all times, and especially when you are braking. The key components to good body position are:

How (Much)

How much and/or how quickly you want to slow or stop will determine how quickly you apply the above principles.

Need to come to a stop or reduce your speed quickly? You’ll want to apply your front brake and back brake at the same time while simultaneously shifting your weight low and back and dropping your heels to weight your pedals, in a quick “STOMP” like motion. This will help you to avoid tumbling forward!

Simply want to control your speed or slow down a little? You will still want to have your heels dropped, knees bent and weight in your feet. Rather than a quick STOMP, you stay loose in the body and adjust your body position as you apply your brakes to stay balanced and centered over the bike.

All Together Now

Braking is not as simple as ON / OFF. There is an art and a science to using your brakes effectively and believe it or not, “good” braking can make you a faster rider. Yup, that’s right; smoother is faster. So start by dialing in the key principles detailed above and you’ll be well on your way to tackling more advanced braking techniques and more advanced terrain with confidence.

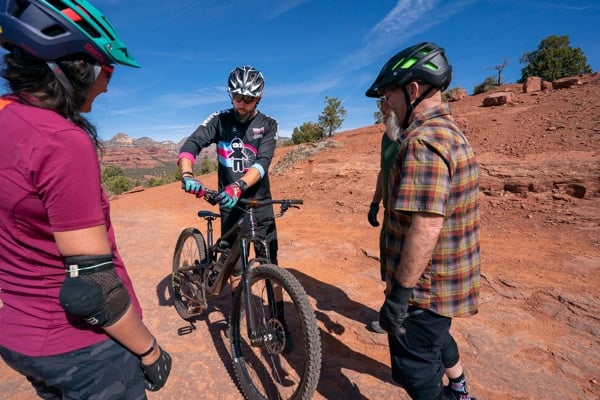
Are you still feeling a bit unstable when you use your brakes? Nervous about going over the handlebars? Looking for in-person feedback on your braking technique? We can help! Join us for a Fundamentals clinic where we cover the foundations of braking and check out a 2-Day Camp to progress to more advanced technique and terrain.

8 Responses

  1. I’ve been riding MTB for 24 years and feel like I just now learned how to brake properly. Thanks Singletracks!

  2. I enjoy the vice of braking into the apex as late as possible, done right momentum is preserved. The acceleration through the apex from slowing down before the corner just is not as fun, even if faster.

  3. My old school roots have me use the rear brake to make the front heavy, traction does increase with use tho diminishing returns await chronic use.

  4. Great article! I think it’s smart for any beginning mountain biker to learn braking and basic fire road handling on a completely rigid bike due to the additional feedback you get from the bike – the rider can feel exactly what is going on with both the bike and their body position. A rigid front fork really hones braking technique as well as keeping the upper body loose to “float” over obstacles on the trail. Modern suspensions forgive so many ham fisted mistakes that one can get bad habits ingrained and when they do crash it is at a much higher speed. Don’t get me wrong, I’ve got a trail bike with almost 6″ of travel front and back and it’s great fun, but learning old school first has its benefits.

  5. Front brake keeps you straight, rear brake means you can make a tighter turn. You shouldn’t be front braking into a tight corner – you’ll run wide on the exit and it can get dicey.

Leave a Reply

Your email address will not be published. Required fields are marked *

keep me in the loop

NOTIFY ME!

I’d like to be notified when new events are added.

Your Privacy is Protected. We will never sell or share your information.

Fundamentals Trail Application - Women's Only

Here’s What We’ll Cover

The specific skills taught in this clinic will depend on available trail features and will vary between locations. Skills covered may include:

  • Rock / Log Step-Ups 
  • Pedal Assisted Front Wheel Lifts
  • Steep Transitions, Roll-Downs
  • Reading trail and line choice
  • Using trail features for maximum flow
  • Turning (Low Speed)
  • Navigating Trail Obstacles
  • Switchbacks – Optimal Line Choice
  • Ratcheting application – how & when 
  • Track stands
  • Braking for Speed 
  • Shifting – Timing + Technique on Technical Terrain
  • Skinnies
  • Off-Camber Trails 
  • Berms 
  • Water crossings 
  • Roots 

The Schedule*

  • 1:15-1:30pm Meet your instructor  | Arrival at course venue + equipment check
  • 1:30 – 1:45pm Fundamentals Skills | Rapid Review 
  • 1:45 – 3:45pm Coached Trail Ride | Sessioning & Skills Application
  • 3:45-4:00pm Review, questions & next steps | #Ridelikeaninja

*Clinic schedule and skills covered may vary according to location and terrain.

Fundamentals Trail Application

Here’s What We’ll Cover

The specific skills taught in this clinic will depend on available trail features and will vary between locations. Skills covered may include:

  • Rock / Log Step-Ups 
  • Pedal Assisted Front Wheel Lifts
  • Steep Transitions, Roll-Downs
  • Reading trail and line choice
  • Using trail features for maximum flow
  • Turning (Low Speed)
  • Navigating Trail Obstacles
  • Switchbacks – Optimal Line Choice
  • Ratcheting application – how & when 
  • Track stands
  • Braking for Speed 
  • Shifting – Timing + Technique on Technical Terrain
  • Skinnies
  • Off-Camber Trails 
  • Berms 
  • Water crossings 
  • Roots 

The Schedule*

  • 1:15-1:30pm Meet your instructor  | Arrival at course venue + equipment check
  • 1:30 – 1:45pm Fundamentals Skills | Rapid Review 
  • 1:45 – 3:45pm Coached Trail Ride | Sessioning & Skills Application
  • 3:45-4:00pm Review, questions & next steps | #Ridelikeaninja

*Clinic schedule and skills covered may vary according to location and terrain.

Ninja Kids clinics

Here’s What We’ll Cover

Some of the skills taught and practiced in the Kids Fundamentals Clinic may include:

  • Ninja (Ready) Position
  • The Riding Rainbow: Body Position
  • How to use your gears
  • Front + Rear Wheel Lifts
  • Safely getting on/off your bike
  • Getting over trail obstacles
  • Turning + Switchbacks
  • Reading the trail: Red Light, Yellow Light, Green Light
  • When and how to brake
  • The 4 Climbing Positions
  • Descending in control
  • How to have fun and be safe!
  • Safety check, bike care

Clinic schedule, time and skills covered may vary according to location and terrain.

2-Day CAMPS

Sample Camp Schedule*

Day 1 (Saturday)

  • 8:45-9:00 Meet your instructor  | Arrival at course venue + equipment check
  • 9:00-9:15 Let’s get started | Introductions, camp overview, bike safety check, bike set-up review
  • 9:15-9:30 Warm-up ride | Head to skills area
  • 9:30-12:15 Mornings skills session | Ready position, bike-body separation, effective braking, fluid shifting, body positioning, wheel lifts
  • 12:15-1:30 Lunch break | BYO
  • 1:30 – 4:00 Intro to jumping | Manuals, bunny hops + how to safely jumping (and land) your mountain bike

Day 2 (Sunday)

  • 8:45-9:00 Meet at trailhead | Gear up for day 2!
  • 9:00-9:15 Review | Brief review of Day 1 skills
  • 9:15-12:00 Morning skills session | High-speed cornering, switchbacks, drops, rock dodge, technical climbing & descending
  • 12:00-1:00  Lunch break | BYO
  • 1:00-3:45 Trail ride + skills application | Put those skills to work!
  • 3:45-4:00 Review, questions & next steps | #Ridelikeaninja


*Clinic schedule and skills covered may vary according to location and terrain.

After camp, you will see an immediate improvement in your riding and a boost in confidence on technical trails. You will be able to tackle rougher terrain and corners with greater control and flow through singletrack, switchbacks, and berms with more speed and efficiency.

Jumping Mini-Clinics

Here’s What We’ll Cover

Some of the skills taught and practiced in the Jumping Mini-Clinic may include:

  • Wheel lift Review
  • Bunny hops
  • Jumping body positioning
  • Anatomy of a jump
  • Speed vs. compression | How and when?
  • Landing with precision
  • Let’s get jumping! | Jump progressions

The Schedule*

Please note, clinics may vary according to location and terrain.

  • 1:30-1:45  Meet your instructor | Arrival at course venue + equipment check
  • 1:45-2:00 Let’s get started | Introductions
  • 2:00 – 2:30  Intro to jumping | Wheel lifts, manual, bunny hop
  • 2:30 – 3:00 Reading the jump | Anatomy of a jump, speed vs compression, landings
  • 3:00 – 3:45 Let’s jump! | Jumping progressions on table tops
  • 3:45-4:00 Review and next steps | #ridelikeaninja


*Clinic schedule and skills covered may vary according to location and terrain.

Intermediate / advanced clincs

Here’s What We’ll Cover

Some of the skills taught and practiced in the Intermediate/Advanced clinic may include:

  • Negotiating trail obstacles (i.e. rock gardens, roots, logs)
  • Steep transitions
  • Drops
  • High speed cornering
  • Technical climbing
  • Technical descending
  • Advanced braking
  • Reading the trail
  • Introduction to energy management & flow
  • Pumping for speed & air
  • Technical Switchbacks (where available)
  • Ratcheting & Trackstands
  • Visualization

The Schedule*

  • 8:45-9:00 Meet your instructor  | Arrival at course venue + equipment check
  • 9:00-9:15 Let’s get started | Introductions
  • 9:15-9:45 Accelerated review of Fundamentals | With intermediate+advanced progressions
  • 9:45-12:00 Morning skills session | High-speed cornering, Switchbacks, drops, rock dodge, technical climbing & descending
  • 12:00-1:00  Lunch break | BYO
  • 1:00-3:45 Trail ride + skills application | Put those skills to work!
  • 3:45-4:00 Review, questions & next steps | #Ridelikeaninja

*Clinic schedule and skills covered may vary according to location and terrain.

WOMEN'S ONLY Fundamentals Combo

Here’s What We’ll Cover

The specific skills taught in this clinic will depend on available trail features and will vary between locations. Skills covered may include:

  • The Ready Position
  • Bike/Body Separation
  • Intro to Steep Transitions
  • Effective Braking
  • Braking for speed
  • Wheels lifts – Step-Ups
  • Shifting, Timing & Cadence
  • Negotiating trail obstacles
  • Turning / Switchbacks
  • Climbing + Descending
  • Dismounting
  • Mind skills
  • Steep Transitions, Roll-Downs
  • Reading trail and line choice
  • Using trail features for flow
  • Turning (Low Speed)
  • Ratcheting – how & when 
  • Track stands
  • Skinnies
  • Off-Camber Trails
  • Berms
  • Water crossings
  • Roots

The Schedule*

  • 8:45-9:00  Meet your instructor  | Arrival at course venue + equipment check
  • 9:00-9:15 Let’s get started | Introductions
  • 9:15am – 11:15 Skills & drills | Learn, learn, learn
  • 11:15am – 12:15 Take it to the trail | Apply what you’ve learned
  • 12:15 – 1:30pm Lunch Break | Rest & Refuel
  • 1:30 – 1:45pm Fundamentals Skills | Rapid Review 
  • 1:45 – 3:45pm Coached Trail Ride | Sessioning & Skills Application
  • 3:45-4:00pm Review, questions & next steps | #Ridelikeaninja

*Clinic schedule and skills covered may vary according to location and terrain.

Co-ed Fundamentals Combo

Here’s What We’ll Cover

The specific skills taught in this clinic will depend on available trail features and will vary between locations. Skills covered may include:

  • The Ready Position
  • Bike/Body Separation
  • Intro to Steep Transitions
  • Effective Braking
  • Braking for speed
  • Wheels lifts – Step-Ups
  • Shifting, Timing & Cadence
  • Negotiating trail obstacles
  • Turning / Switchbacks
  • Climbing + Descending
  • Dismounting
  • Mind skills
  • Steep Transitions, Roll-Downs
  • Reading trail and line choice
  • Using trail features for flow
  • Turning (Low Speed)
  • Ratcheting – how & when 
  • Track stands
  • Skinnies
  • Off-Camber Trails
  • Berms
  • Water crossings
  • Roots

The Schedule*

  • 8:45-9:00  Meet your instructor  | Arrival at course venue + equipment check
  • 9:00-9:15 Let’s get started | Introductions
  • 9:15am – 11:15 Skills & drills | Learn, learn, learn
  • 11:15am – 12:15 Take it to the trail | Apply what you’ve learned
  • 12:15 – 1:30pm Lunch Break | Rest & Refuel
  • 1:30 – 1:45pm Fundamentals Skills | Rapid Review 
  • 1:45 – 3:45pm Coached Trail Ride | Sessioning & Skills Application
  • 3:45-4:00pm Review, questions & next steps | #Ridelikeaninja

*Clinic schedule and skills covered may vary according to location and terrain.

Ninja MTB Logo

Women's Only Fundamentals Clinics

Level 1 - Here’s What We’ll Cover

Some of the skills taught and practiced in the Women’s Only Fundamentals Clinic may include:

  • The Ready Position
  • Bike/Body separation
  • Intro to Steep Transitions
  • Effective braking
  • Wheels lifts
  • Shifting + cadence
  • Negotiating trail obstacles
  • Turning / Switchbacks
  • Climbing + Descending
  • Dismounting
  • Mind skills

The Schedule*

  • 8:45-9:00  Meet your instructor  | Arrival at course venue + equipment check
  • 9:00-9:15 Let’s get started | Introductions
  • 9:15am – 11:15 Skills & drills | Learn, learn, learn
  • 11:15am – 12:00 Take it to the trail | Apply what you’ve learned
  • 12:00-12:15 Review and next steps | #ridelikeaninja
 

*Clinic schedule and skills covered may vary according to location and terrain.

Ninja MTB Logo

Co-ed Fundamentals Clinics

Level 1 - Here’s What We’ll Cover

Some of the skills taught and practiced in the Fundamentals Clinic may include:

  • The Ready Position
  • Bike/Body separation
  • Intro to Steep Transitions
  • Effective braking
  • Wheels lifts
  • Shifting + cadence
  • Negotiating trail obstacles
  • Turning / Switchbacks
  • Climbing + Descending
  • Dismounting
  • Mind skills

The Schedule*

  • 8:45-9:00  Meet your instructor  | Arrival at course venue + equipment check
  • 9:00-9:15 Let’s get started | Introductions
  • 9:15am – 11:15 Skills & drills | Learn, learn, learn
  • 11:15am – 12:00 Take it to the trail | Apply what you’ve learned
  • 12:00-12:15 Review and next steps | #ridelikeaninja
 

*Clinic schedule and skills covered may vary according to location and terrain.

LEAVING SO SOON?

60% Off

IF YOU SIGN UP FOR A MTB SKILLS CLINIC TODAY!

Enter your email below to get your limited time coupon code (valid for 48 hours).

Valid on all Skills Camps and Clinics. Your Privacy is Protected.

Awesome sauce!

60% Off

USE THIS CODE TO SIGN UP TODAY!

CHECKOUT4XY2

*Limited time offer. Valid for 48 hours on any upcoming MTB skills clinic or camp.